Automate your laptop setup with Ansible
Introduction
You don't have to set up a new laptop every day. But if you have done it recently you probably remember that it was time-consuming. In fact, the most complex setups can take weeks to reproduce because of all the details and configuration settings. This post will teach you how to automate your laptop set up with Ansible. The examples I will show are for macbooks but can be applied to any kind of laptop.
Prerequisites
To follow this tutorial you must have Ansible and homebrew installed:
To install homebrew:
/usr/bin/ruby -e "$(curl -fsSL https://raw.githubusercontent.com/Homebrew/install/master/install)"To install ansible:
sudo easy_install pip
sudo pip install ansible
Step 1 - Hello ansible
Ansible is configured with yaml files. It expects the files to be organized following this convention:
├── inventory -------------> Mapping of hostname to group name
├── roles
│   ├── development
│   │   ├── files
│   │   │   └── tmux.conf -> A file used by the role
│   │   └── tasks
│   │       └── main.yml --> Tasks for the role development
└── site.yml --------------> Mapping of group name to roleinventorymaps hostname (in our case localhost), with a group name (in our caselaptop)site.ymlmaps group names (laptop here) to roles (here we have one role: development.roles/developmentis a role, it defines the actual operations that Ansible will run
Before using ansible to set up our laptop, let's build a hello world example to make sure everything is set up propertly. Create the following file structure on disk:
├── inventory -------------> Empty file
├── roles
│   ├── development
│   │   └── tasks
│   │       └── main.yml --> Empty file
└── site.yml --------------> Empty file
As we said the inventory maps hostnames to group names. Update the content of inventory with:
[laptop]
localhost
This means that we declare a group "laptop" that contains one host: "localhost".
Next let's look at the main entry point: site.yml, it maps group names to roles and is called a playbook.
Update the content of site.yml to associate the group laptop with the role development :
- hosts: laptop
  roles:
    - development
Finally let's add some code to main.yml at roles/development/main.yml to write Hello ansible to the file /tmp/log :
- name: Hello ansible
  shell: echo "Hello ansible" >> /tmp/log
You can run this playbook with:
ansible-playbook -i inventory site.yml -c local
-c local tells Ansible not to try to connect through ssh but rather run the playbook (site.yml) locally.
The run should have created a file /tmp/log containing Hello ansible.
Now that we have a basic structure in place we can add more roles and more useful tasks!
Step 2 - Installing packages with homebrew
We can install packages with homebrew using the following construct:
- name: Install apps with homebrew
  homebrew: name={{ item }} state=present
  with_items:
    - wget
    - vim
    - tmux
    - htop
    - ag
    - git
    - python3
    - zsh
    - bash
    - reattach-to-user-namespace
    - hugo
    - graphviz
    - mosh
Notice the with_items key that let's you specify multiple items for a step!
Step 3 - Installing apps
Did you know that homebrew could also install apps? To do so you can use homebrew casks :
- name: Install cask packages
  homebrew_cask: name={{ item }} state=present
  with_items:
    - iterm2
    - spectacle
    - 1password
    - google-chrome
    - dropbox
Step 4 - Copying dot files
What if you need to copy config files? Just put them under the files folder of your role (alongside the tasks folder) and use: "{{ role_path }}/files/name_of_a_file" to refer to those files. Here is an example:
- name: Copy tmux configuration
  copy:
    src: "{{ role_path }}/files/tmux.conf"
    dest: ~/.tmux.conf
Step 5 - Managing configuration in repositories
While keeping files alongside your Ansible configuration is an option, lots of people like to store their files in a separate repository. You can clone repositories using the git task:
- name: Clone repo
  git:
    repo: https://github.com/foo/dotfiles
    dest: ~/dotfiles
    update: no
Then in that case, for dotfiles, you would create links between the files in the repository and your home folder.
Step 6 - Setting up system default
We nearly covered everything you need to automate the setup of a laptop, but one important topic is missing: System Defaults.
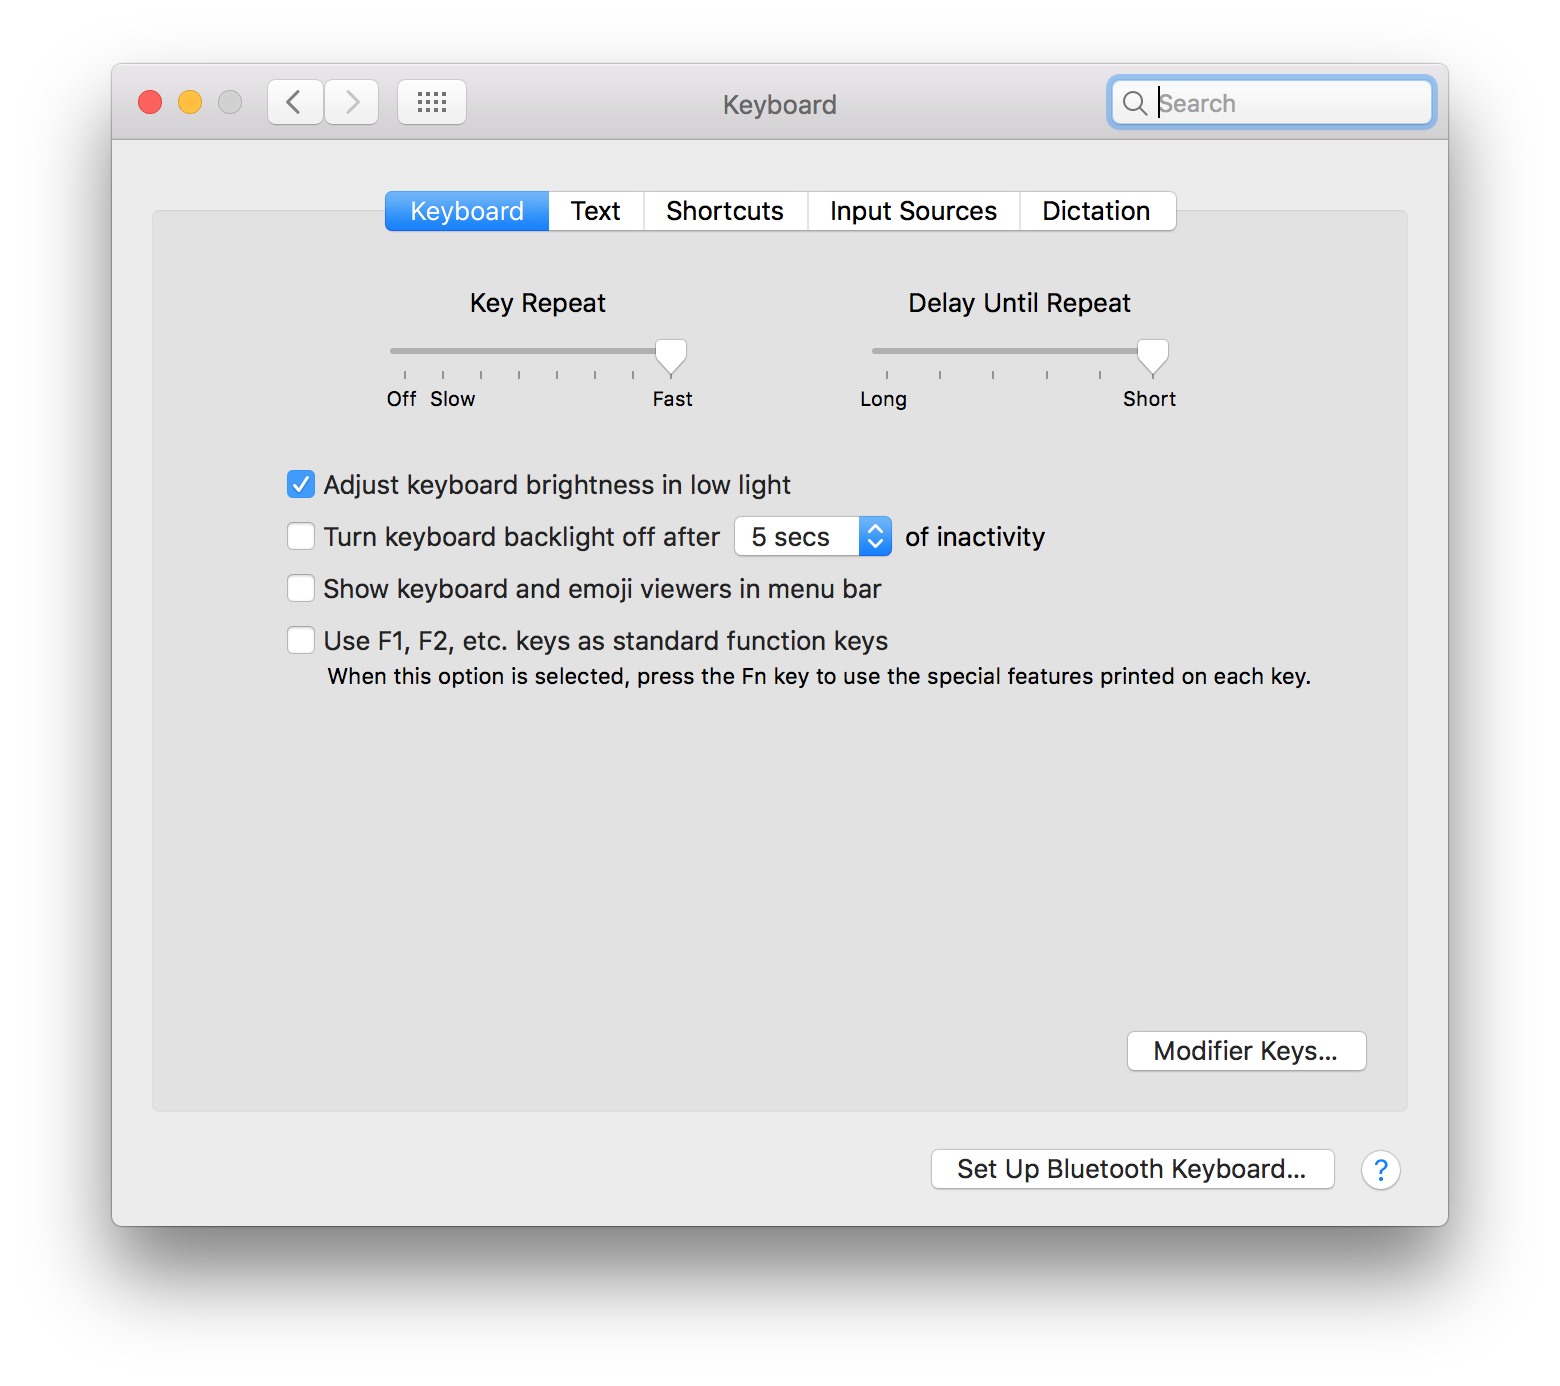
When you change a setting in Mac OS, for example, the key repeat setting:

It gets written as a system default. You can look up online the name of those defaults and replicate them using the osx_default_module.
For example, my key repeat settings that I showed above look like this in Ansible:
- osx_defaults:
    key: KeyRepeat
    type: int
    value: 2

- osx_defaults:
    key: InitialKeyRepeat
    type: int
    value: 15
Conclusion
If you follow Ansible best practices, rerunning a playbook on a system already configured should be idempotent (it should be a no-op). I encourage you to write your laptop setup as an Ansible config and reflect any change to it as you go to keep it up to date.
Now that you know how to set up laptops programmatically you can think about areas to apply this skill! For example, if your company does not set up laptops automatically, you can suggest it as a project that will have a significant impact and speed up onboarding.
Also, if you are interested in more content about Ansible, check out: Set up digital ocean block storage with Ansible.