How I Deploy Apps to My Homelab (A Love Story in 9 Acts)
I run about 50 services on my homelab. Grafana, Home Assistant, a sleep tracker that watches my toddler (creepy but useful), and a bunch of other things that make my life either easier or more complicated depending on the day.
Here’s the entire flow of how a service goes from “I have an idea” to “it’s running on my network with HTTPS and monitoring.”
Act 1: The Idea

It always starts the same way. I’m on the couch, probably procrastinating on something important, when I think: “What if I built a thing that…”
The thing could be anything. A dashboard for my Tesla. A proxy for my NVR. A service that uses GPT-4 to determine if my daughter is sleeping with her stuffed elephant.
Act 2: The Repository
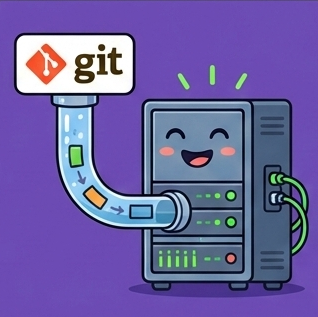
First, I create a repo on my local git server (yes, I self-host git because I’m that person):
new_repo my-brilliant-idea
This creates a bare repo at git.lan:/home/git/repos/my-brilliant-idea and clones it locally. No GitHub, no cloud, just a VM with git on it.
Act 3: The Code

I write the service. Usually Go or Python, depending on the mood.
// Go: when you want to feel productive
func main() {
    port := getEnvInt("PORT", 7234)
    http.HandleFunc("/health", healthCheck)
    http.ListenAndServe(fmt.Sprintf(":%d", port), nil)
}
# Python: when you want to feel happy
app = Flask(__name__)

@app.route('/health')
def health():
    return {'status': 'ok', 'mood': 'cautiously optimistic'}
Every service needs a /health endpoint. This isn’t optional. Gatus will judge you.
Act 4: The Ansible Role
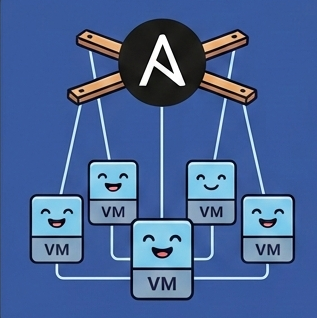
Here’s where things get spicy. I never SSH into a server and run commands manually. That’s for people who enjoy chaos.
Instead, I create an Ansible role in ~/repos/homelab/roles/<service>/tasks/main.yml:
- name: Git checkout my-brilliant-idea
  ansible.builtin.git:
    repo: "{{ git_base_url }}/my-brilliant-idea"
    dest: "{{ base_folder }}/my-brilliant-idea"
  register: update_git

- name: Build it
  shell: "go build -o my-brilliant-idea ."
  when: update_git.changed

- name: Systemd service
  become: yes
  copy:
    content: |
      [Unit]
      Description=My Brilliant Idea
      [Service]
      ExecStart={{ base_folder }}/my-brilliant-idea/my-brilliant-idea
      Environment="PORT=7234"
      Restart=always
    dest: /etc/systemd/system/my-brilliant-idea.service
This means I can blow away a server, run the playbook, and everything comes back exactly as it was. Chef’s kiss.
Act 5: The Metadata

Every service gets an entry in roles_metadata.yml:
my_brilliant_idea:
  services:
    my_brilliant_idea:
      port: 7234
      domain: "brilliant.lan"
      display_name: "My Brilliant Idea"
      description: "Does something brilliant, probably"
      icon: "💡"
This single file drives everything else: DNS records, Caddy config, the service index, Gatus monitoring. One source of truth to rule them all.
Act 6: The Generator

A Python script reads roles_metadata.yml and generates:
- DNS records →
host_records.json→ pushed to UniFi controller - Caddyfile entries → reverse proxy config for HTTPS
- Gatus endpoints → health monitoring
- Service index → pretty dashboard at
index.lan
One command, four outputs. Because typing things twice is for mortals.
Act 7: The Certificate

Remember that lan-ca tool I wrote? This is where it shines.
The homelab uses explicit SANs (not wildcards), so every new domain needs to be added to the cert:
# Regenerate cert with all domains
lan-ca generate $(cat host_records.json | jq -r '.[].aliasName' | tr '\n' ' ')

# Copy to Caddy role and deploy
cp ~/.lan-ca/certs/* ~/repos/homelab/roles/caddy/files/certs/
ansible-playbook playbook_main.yml --tags caddy
Green padlocks everywhere. Your browser trusts you. Your mom would be proud.
Act 8: The Deployment

Finally, the moment of truth:
cd ~/repos/homelab
source bin/activate

# Deploy the service
ansible-playbook playbook_services_experimental.yml --tags my-brilliant-idea

# Deploy Caddy (reverse proxy)
ansible-playbook playbook_main.yml --tags caddy --limit robot.lan

# Deploy DNS
ansible-playbook playbook_main.yml --tags unifi_dns

# Deploy monitoring
ansible-playbook playbook_main.yml --tags gatus
The service is now:
- Running on
robot.lan:7234 - Accessible at
https://brilliant.lan - Monitored by Gatus
- Listed on
index.lan
Act 9: The Dashboard

Everything ties together at three dashboards:
index.lan — A generated homepage listing every service with icons and descriptions. Click to visit.
gatus.lan — Health checks for everything. Green means good. Red means I’m getting a Pushover notification at 3am.
grafana.lan — Metrics, logs, and the existential dread of watching your RAM usage climb.
Why This Madness?
Because I can rebuild everything from scratch. Ansible playbooks are my source of truth. If a VM dies, I spin up a new one, run the playbook, and everything comes back.
No “I think I installed something manually once.” No “what’s that cronjob doing?” No mystery.
Just YAML. So much YAML.
Teaching AI to Deploy
Here’s the fun part: I wrote all of this as a “skill” document that teaches Claude Code how to deploy services to my homelab. When I ask Claude to create a new service, it reads this guide and follows the steps automatically.
The skill lives in my personal knowledge base, and Claude loads it at the start of any homelab session. It knows about the port allocations, the Ansible patterns, the certificate dance—everything.
Here’s the full skill document:
# Homelab Deployment Guide

Guide for deploying Go and Python services to robot.lan via Ansible.

## Overview

Services are deployed to `robot.lan` (experimental host) using Ansible roles in `~/repos/homelab`.

## Port Selection

Pick a random port between 4000-9999 to avoid collisions. Already used ports:
- 4444: nvr-proxy (NVR frame caching)
- 5555: leonie_sleeps (sleep tracking)
- 8080: (commonly used, avoid)
- 8888: (commonly used, avoid)

## Creating a New Service

### Step 1: Create the Repository

Use the `new_repo` command to create a new git repo:
new_repo my-service

### Step 2: Write the Service

#### Go Service Template
package main

import (
    "fmt"
    "log"
    "net/http"
    "os"
    "strconv"
)

func getEnvInt(key string, fallback int) int {
    if v := os.Getenv(key); v != "" {
        if i, err := strconv.Atoi(v); err == nil {
            return i
        }
    }
    return fallback
}

func main() {
    port := getEnvInt("PORT", 7234)  // Pick random port!

    http.HandleFunc("/health", func(w http.ResponseWriter, r *http.Request) {
        w.Write([]byte(`{"status":"ok"}`))
    })

    log.Printf("Starting on port %d", port)
    http.ListenAndServe(fmt.Sprintf(":%d", port), nil)
}

#### Python Service Template (Flask)
from flask import Flask
import os

app = Flask(__name__)

@app.route('/health')
def health():
    return {'status': 'ok'}

if __name__ == '__main__':
    port = int(os.environ.get('PORT', 7234))
    app.run(host='0.0.0.0', port=port)

### Step 3: Create Ansible Role

Create `~/repos/homelab/roles/<service_name>/tasks/main.yml`

### Step 4: Add to Playbook

Edit `~/repos/homelab/playbook_services_experimental.yml`

### Step 5: Deploy

cd ~/repos/homelab
source bin/activate
ansible-playbook playbook_services_experimental.yml --tags <service>

## CRITICAL: Deploy Caddy to the Target Host

When deploying a new service, DNS creates a CNAME that points the service
domain to the target host. Caddy must be deployed on that same host.

### Correct Deployment Sequence
1. Deploy the service
2. Deploy Caddy on the same host
3. Deploy service_index
4. Deploy DNS

## CRITICAL: Regenerate TLS Certificate for New Domains

The homelab uses explicit SANs (not wildcards). When adding a new service,
regenerate the certificate to include the new domain.
Now when I say “deploy a new Flask app called weather-tracker to my homelab,” Claude knows exactly what to do. No more explaining the process every time.
Infrastructure as code, sanity as a service.
Illustrations generated by AI.
Last modified: 2025-12-14 · Deployed: 2025-12-14 12:36 PST · Commit: 94f8656